Fix Dockerfile
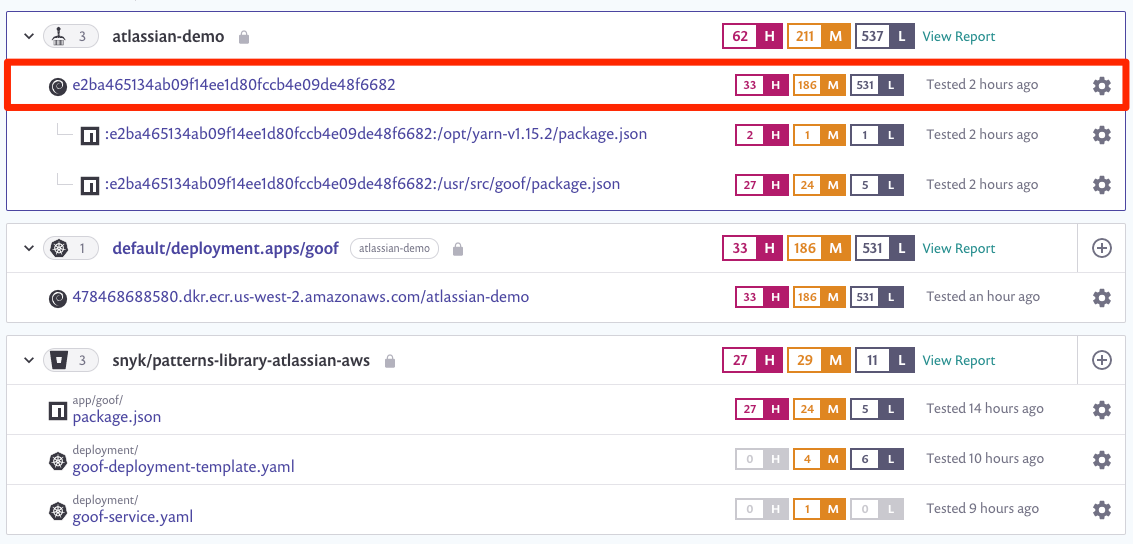
From the Snyk app, we will go to the Projects menu where we can expand each integration and have a holistic view of our project. Here we will select the container image under our Amazon ECR repository.
You will notice a message instructing you to complete one minor configuration item. Let’s address that by clicking the Settings tab.
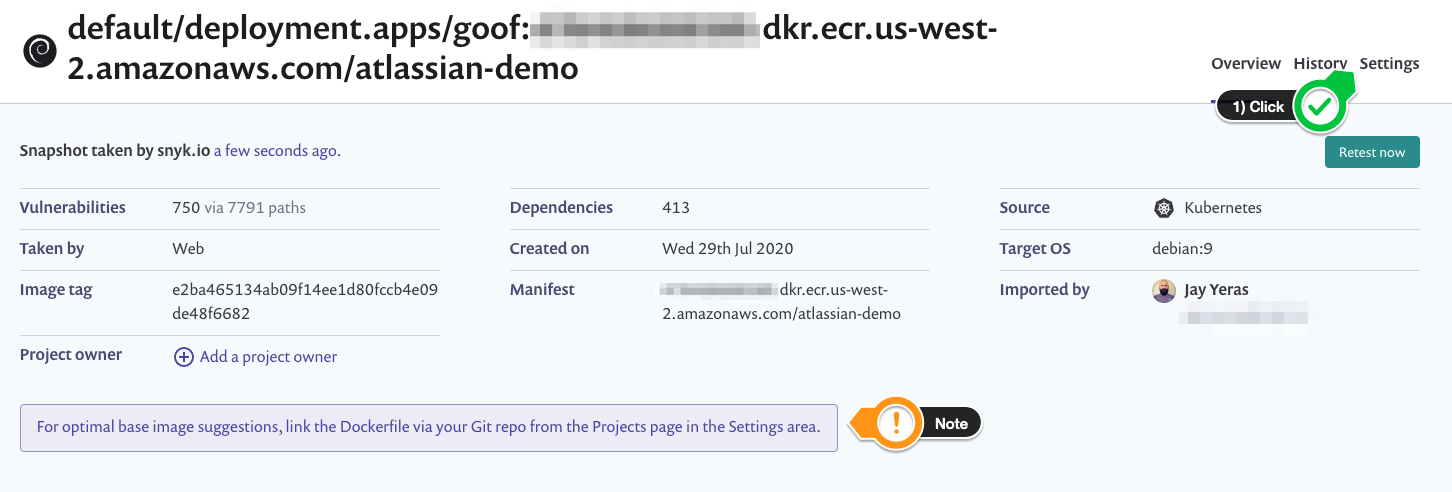
Proceed to click on the Configure Dockerfile button.

Select Bitbucket Cloud as your source.

Select your repository and click Update Dockerfile.

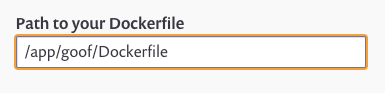
Update the default path with the path to our Dockerfile. In this case, the path is /app/goof/Dockerfile or as shown below:
You will receive a confirmation message stating that the settings have been successfully applied.

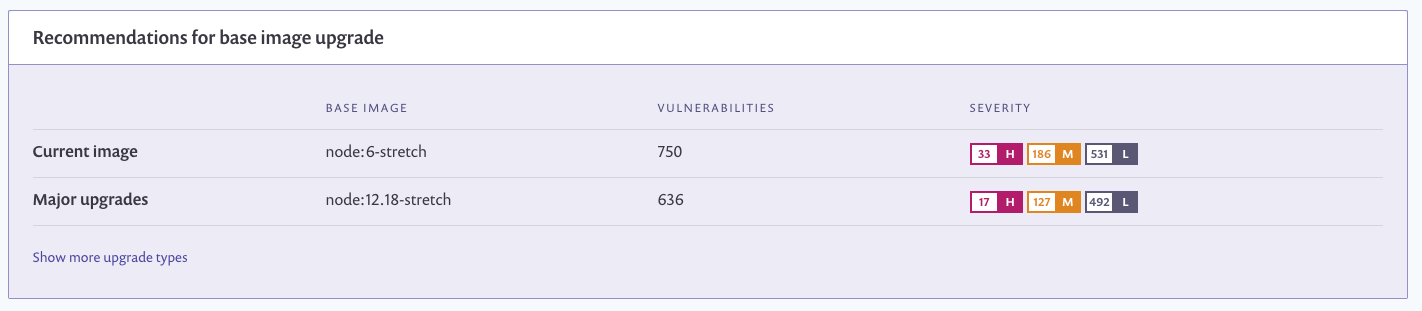
Recommendations for base image upgrade will be provided to you. Here, you will notice the Current image defined in your Dockerfile and a Major upgrade suggestion to reduce the total number of vulnerabilities on your container image.
For the purpose of this exercise, we will keep things simple and use Bitbucket’s built-in editor to make the change. Let’s navigate to our Dockerfile in
our Bitbucket repo. The path will be ./app/goof/Dockerfile. Here we can Edit the file and save our changes.

Let’s update Line 1 as follows:
- OLD VALUE:
node:6-stretch - NEW VALUE:
node:12.18-stretch
Click Commit.